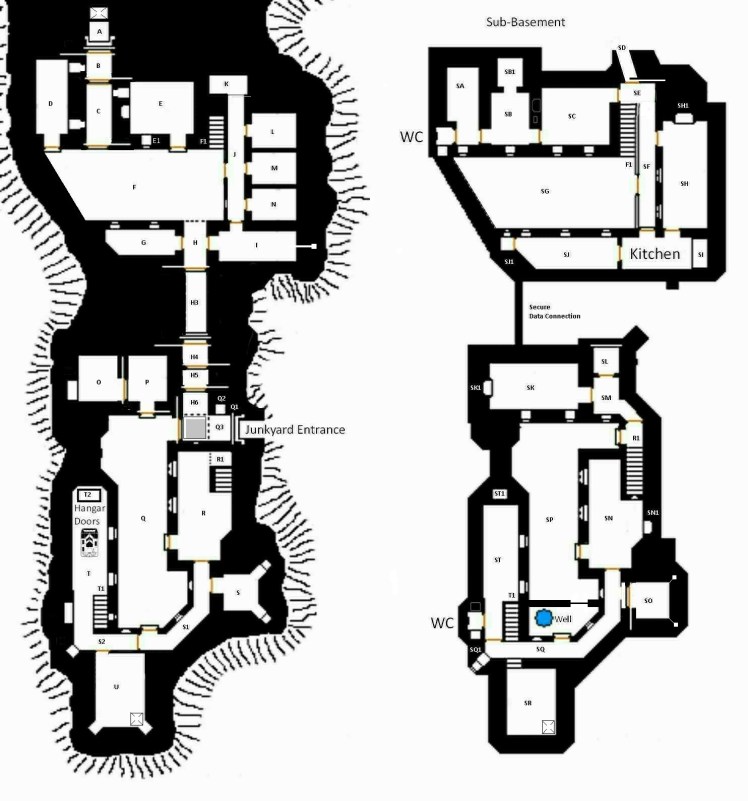
Unless specifically stated, the floor throughout consists of metal panels sealed over with a thin warm plastic blue carpet-like flooring with inset translucent panels in the centre of rooms and corridors covering integrated multicolour lighting panels to provide direction to specific locations (similar to emergency Floor Path Illumination used to guide people to exits – different colours lead to different locations) and translucent white ceiling panels, the fireproof ceramic wall and ceiling panels in shared areas are cream coloured.
The BASEmates (The Balance Support Team)
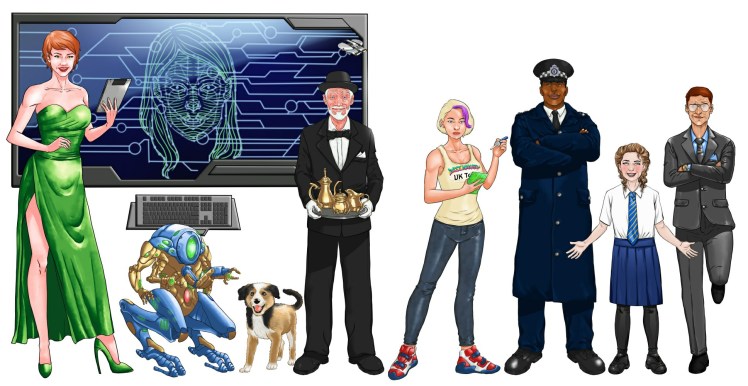
Consisting of hacker and team medic ‘Android Annie’ Moreau, A.I. advisor Frankie, a Dwarf Maintenance Droid, Rascal (the terrier), Team Majordomo Edward Jeeves, Tinks the camera drone (hovering), caretaker artist and technokinetic Mikey (Michaela) Angelo, Wessex Police team liaison Inspector Marcus Tolliver, sponsor Bethany Dalton and her Legal Advisor Jim Selachi Jr aka ‘Jimmy the Fish’
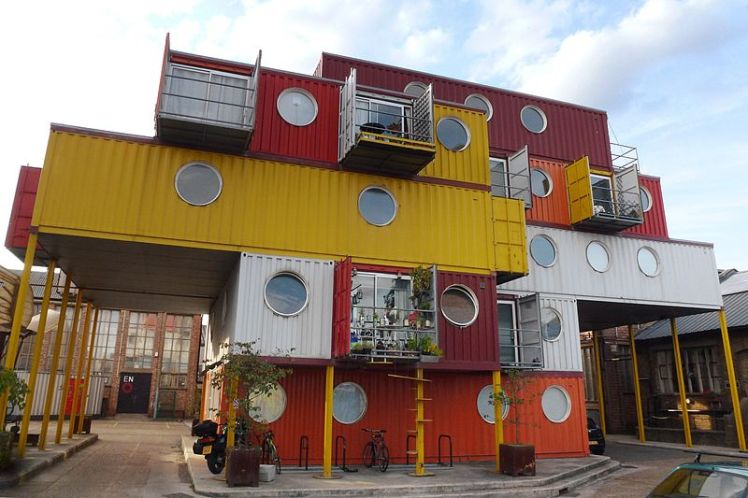
Container Town
A – Passage way – exits out in Container Town (by lift to the surface) in a small shipping container welded to Mary’s home container. Access is via a biometric scanner. There is also an air vent into the shaft. The corridor faces an iris-type doorway with biometric security and full body scanner controlled from the Monitoring Room E.
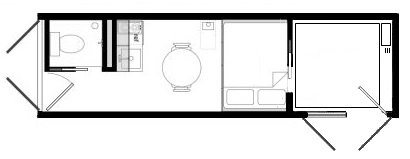
B – Section of Corridor with solid granite floors and walls beneath the floor, roof and wall panels (able to be turned into a security cell by the deployment of sliding blast doors). The section of corridor is monitored by cameras (including IR) and a full suite of sensors concealed behind hidden alcoves in the wall. They also contain a remote controlled canister of sleeping gas and lighting controls – attack mode consists of total darkness for 12 seconds then bright strobe effect. All effects are controlled from Monitoring Room E.
C – Section of Corridor (able to be turned into a security cell – see B).

Living Quarters
D – Teleport Reception Room – Akira uses a personally attuned crystal taken from Tiamente’s Cave in Wales to ensure he can locate and teleport into this room from outside without materialising inside walls. It also acts as a barrier to deflect any teleporter not attuned to the crystal’s specific resonance.
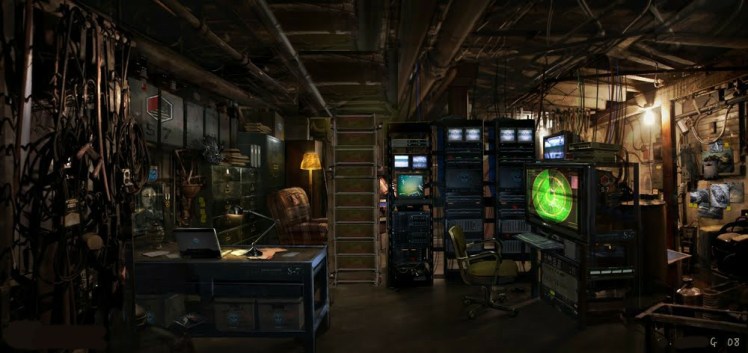
E – Communications/Monitoring Room, fitted out by Annie with her expanded hybrid now sentient AI computing system nicknamed Frankie. The room has two gaming chairs facing the primary bank of monitors including CRT and TV screens which she uses to access and monitor the internet. Frankie and the online avatar called Pseudo-Annie are controlling the systems.
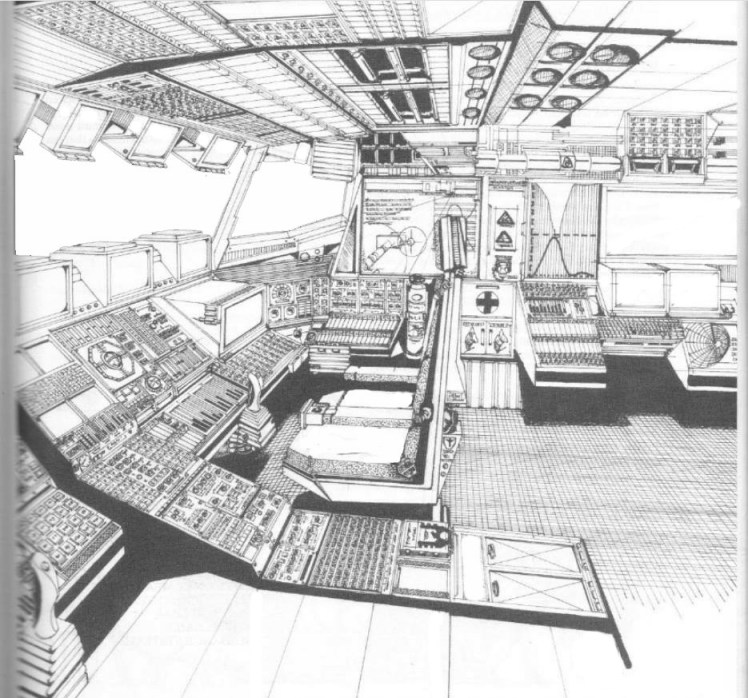
E1 – Primary Server isolated from outside the BASEment and separate to Frankie’s online connection. Used to control all internal functions including life support, doors and security.
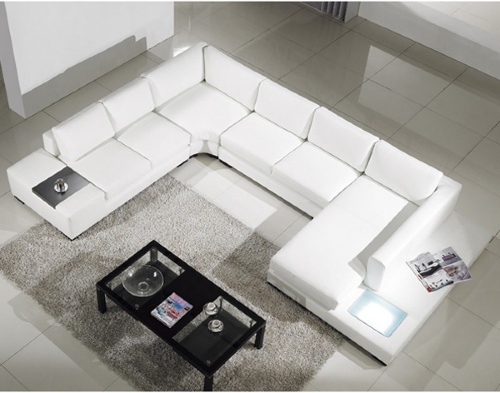
F – Living Room, Has a large flat-screen TV (can also be accessed by Annie and Frankie to convey mission information and camera feeds both internal and external) on the West Wall faced by a semi-square of sofas, armchairs and various gaming systems (hobbled together by Annie and Adam).
F1 – Stairwell to sub-basement – exits in room SG.
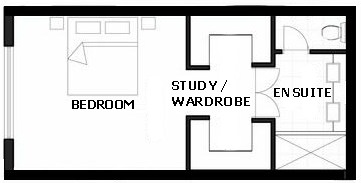
G – Guest Dormitory, it contains a double bed, a pull across room divider, a pair of bunkbeds and ensuite facilities.
I – The Firing Gallery AKA the Black Room – a room initially designed to allow Young Sam to experiment with his fire powers. Painted black it contains fireproof automaton target dummies – holographically equipped Mobile Mannequin Distractions (MMD’s) and balance beams for individual training. The room is connected by a small chimney to the surface (via a false chimney in Container Town) to allow the smoke to be extracted.

J – Corridor.
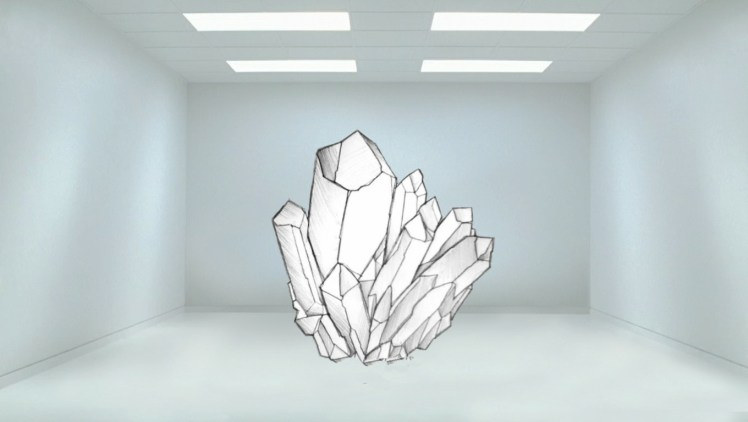
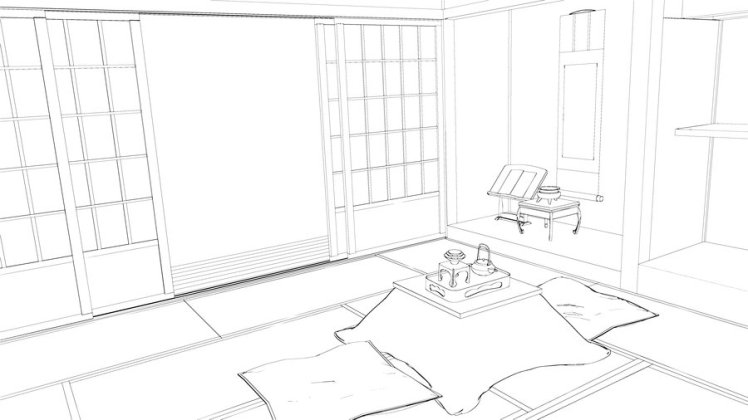
K – The White Room; meditation space designed by Akira. North-East corner contains a small fountain. Psychically ‘sound-proofed’. Previously ‘haunted’ by the ghost of Doctor Arcane.
L – Akira’s Bedroom with ensuite facilities.
M – Bedroom with ensuite facilities – Previously allocated to Banshee, but as she insists on living above in Container Town, the room was used by Mace until her departure.
N – Bedroom with ensuite facilities (maintained).
H – Corridor running between the Living Quarters and the Mission Wing sections of the BASEment.
H3 – Section of Corridor (able to be turned into a security cell – see B) there is an iris-type doorway with biometric security incorporated into this section of the corridor.
H4 – Section of Corridor (able to be turned into a security cell – see B).
H5 – Section of Corridor (able to be turned into a security cell – see B).
H6 – Connecting Corridor to Q3 (Junkyard Entrance) & leading to Grav-Trap. Beneath the floor is an anti-grav thruster plate which, when activated, generates a gravity containment field alternating between zero gravity and a 4G field.
Q1 – Entrance/exit to the Junkyard – The entrance consists of a set of double metal doors to the Northern side of the shack which conceal a sloping tunnel, at the bottom of which is an iris-type doorway with biometric security and full body scanner controlled from the Monitoring Room E.
The junkyard has been taken over and is now run by Mikey (Michaela Angelo) who has used a scrapped car as part of a spider-like sculpture over the main gate (and houses the surface scanners and security system).
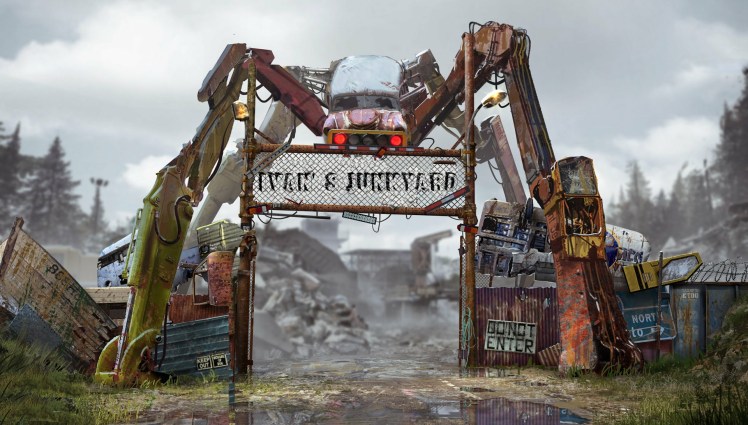
In addition, there are three ‘guard-dog’ robots – ‘Hercules’, ‘Xena’ and ‘Gabrielle‘ built by technopath Mikey Angelo – roaming the grounds. The BASEmates installed a Stealth shield over the hangar doors.

Q2 – Gravity Generator, Sensor Suite/Signal Jammer
Q3 – Connecting Corridor to Q3 (Junkyard Entrance) leading to Grav-Trap (generates 4G field)
Mission Wing
O – Secure monitored holding cell with toilet (O1) and integrated blast door. Can be flooded with sleeping gas.
P – Interrogation Room, fully monitored (including cameras designed to capture and analyse micro-gestures and read pulse, skin temperature and dryness etc.) Has integrated blast door and can be flooded with sleeping gas.
Q – Meeting space, there is a table in the centre of the room, display space for trophies and plants as well as manually operated cameras to allow for press conferences.
Trophies on display include:
– An over-bright, light up musical Christmas jumper.
– Naomi’s gift to Jeeves, demon banishing amulet in a glass case.
– A copy of a first edition of “Alice in Wonderland” on a stand.
– A mystical dream-catcher.
– Antique can-opener from Akira’s ancestral home.
– Full-size cutout of Red Srulik and the framed brass rubbing of the Sabra plaque made by Young Sam.
– Original Library invitations.
– Chrono’s original detective office plaque and Akira’s.
– Framed King Bee’s XXXXL signed merchandise shirt.
– Issue one of Castle Comics’ The Balance (written in Hebrew).
– The Bargainers calling card (in a sealed transparent plasti-steel container).
– A remnant of Superior Rex’s damaged, mechanical head on a plinth.
– Opposite is a shattered Robo-saurus head.
– Fragments of Mekha Prime.
– A pair of Parasite Discovery Googles.
– Dakatan Red Hyena Mask.
– A dull grey metallic amulet of Yig from Claremont Academy.
– Madrigal of Terminus’ helmet brought back from the Faerie Realms.
– The Topaz Blade Pendant.
– Souvenir copy of Excalibur from the London Mithraeum Exhibit.
– Locker’s Uniform.
– The Bargainer’s necklaces (each in their own sealed container).
– A rear limb from a Pentabug mechanoid.
– A Kult Hearing Amplifier.
– Fragments of the Summoning Stone of Raknis.
R – Research Library with case files and secure access to databases of known villains.
R1 – Stairwell to sub-basement – exits in room SM.
S – Allocated as an armoury for riot control equipment. Currently contains body armour for the BASEmates, a rack of 3 stun pulse rifles, a mounted unit, 2 portable freeze rays, a mounted freeze ray, crate of nine distraction (UV & garlic) grenades, and a couple of crossbows and bolts. Recently added is a hermetically-sealed container with three juju bags.
S1/S2 – Connecting Corridors – the alcove on the South-West Corner contains a scrap sculpture of a vaguely alien creature made by Mikey. This rises into the roof to allow the cargo lift from SQ1 to rise.
T – Hangar Bay. T2 is a ramp exiting via concealed hangar bay doors made from welded scrap heaped into an apparent pile in the junkyard. A stealth shield in in development.
The hangar used to hold the Raft, a larger grav-transport; the Crate and Mace’s grav-bike.
T1 – Stairwell to sub-basement – exits in room ST with access to SN – SR.
U – Engineering Workshop (and previously a bedroom for Adam). This contains most of the maintenance equipment and tools. There is an open service lift in the South-East corner of the room that links the Arc Reactor in SR with his engineering space.
Living Quarters – Sub-BASEment
SA – Isolation Wing contains beds and medical monitoring equipment for a max of four patients. Monitored from E. Contains its own internal life support systems and anti-contamination facilities.
SB – Treatment room (capable of being isolated and decontaminated if required).
SB1 – Operating Theatre.
SC – Medical diagnosis room with CT scanner & MRI and integrated monitoring/consultancy room. If required, this would be overseen by Annie.
SD – Sewer tunnel linking the BASEment to the mains utilities and drainage system. A blast door and alarms have been integrated into the last 100m of the sewer.
SE/SF – Corridor
SG – Games Room with a massive repeating twister game patterned carpet on the floor, a full size pool table and DJ equipment. Posters are framed on the wall.
SH – Dining area
SH1 – Fully stocked Bar with a neon sign above it “Chrono’s Drinks Repository”.
Commercial Kitchen
SI – Walk-in Fridge
SJ – Fully stocked pantry (with a three months’ supply of food and water).
SJ1 – Walk-in Freezer
Mission Quarter – Sub-BASEment
SK – Fully equipped gym & dojo with meta-human grade weights.
SK1 – Apparent compartment in the wall (bricked over).
SL – Male and female Shower Rooms
SM – Changing room with individual lockers and automated massage tables.
SN – Training Simulator viewing room – also acts as a secondary monitoring room.
SN1 – Server isolated from outside the BASEment. Used to control The Training simulator.
SO – Secure vault area with blast door and incinerator failsafe (needs two team members to operate) the smoke and excess heat exits by two filtered chimneys.
SP – Training Room / Combat Simulator with armed holographicallly-equipped MMDs. The southern end of the room contains a well which has been separated from the rest of the room by blast proof walls. The well section has a one-way transparent plasti-steel door to allow viewing. On the wall beside the well are a selection of facemasks and charged rebreathers.
SQ – Connecting corridor. SQ1 is a ‘dumb-waiter’ cargo lift that causes Mikey’s statue in the alcove to rise to allow the lift to appear.
SR – The reactor room. Housing the BASEment’s primary generator, a Challenger-Wildeman Arc Reactor utilising water from the underground river (the River Isis) connected to the well as its primary fuel source.
ST – Workspace with an industrial 3D fabricator and circuit printer.
ST1 – Hydrogen fuel Tank for hangar fed by underground pipes from the Reactor Room (SR).
